How to Install and Configure GitLab on CentOS 7

Prerequisites
This tutorial assumes that you have a fresh CentOS 7 installation.
According to the GitLab requirements page, it is recommended to use a server with:
- at least 4GB of RAM memory .
- 2 CPU cores.
- at least 2GB of swap space .
- (optional) Domain or subdomain pointing to the server IP address.
For an additional layer of security, it is recommended to set up a basic firewall.
The user you are logging in as must have sudo privileges to be able to install packages.
Installing Required Dependencies
Refresh the local package index and install the dependencies with the following commands:
$sudo yum install curl policycoreutils-python openssh-server
In order for GitLab to be able to send notification emails, you can either install and use Postfix or use some transactional mail service such as SendGrid, MailChimp, MailGun or SES in which case you can skip this following step and configure [GitLab’s SMTP settings] (https://docs.gitlab.com/omnibus/settings/smtp.html ) after the installation is completed.
Run the following commands to install Postfix on your CentOS server:
$sudo yum install postfix
During the installation, you will be asked to select the mail server configuration type. The default option is Internet Site. That’s the recommended option just press TAB, then ENTER.
Next, you’ll be prompted to enter the System mail name which should be same as your server hostname.
Once the installation is complete, start and enable the postfix service by running the following commands:
$sudo systemctl start postfix$sudo systemctl enable postfix
Installing GitLab
GitLab installation is a pretty straight forward process. We will install the GitLab CE package using the yum package manager.
Start by adding the GitLab repository to your system sources list using the following curl command :
$curl https://packages.gitlab.com/install/repositories/gitlab/gitlab-ce/script.rpm.sh | sudo bash
The script will enable the repository and install necessary dependencies. Once complete, install the GitLab package by running the following command:
$sudo yum install gitlab-ce
You will be prompted to accept the GitLab repository GPG keys. Type y and press Enter.
The installation process may take a while and after a successful installation, you will see the following output:
Thank you for installing GitLab!
...
Complete!

Adjusting the Firewall Rules
The guide about setting up a basic firewall is linked in the prerequisites section. To be able to access the GitLab interface you’ll need to open ports 80 and 443. To do so run the following commands:
$sudo firewall-cmd --permanent --zone=public --add-service=http$sudo firewall-cmd --permanent --zone=public --add-service=https$sudo firewall-cmd --reload
Set the GitLab URL
Before accessing the GitLab web interface we need to set the URL on which GitLab will be reachable. Open Gitlab’s configuration file and make the following changes:
$sudo vim /etc/gitlab/gitlab.rb
Near the top of the configuration file, you will see a line starting with external_url. Change the value to match your domain/subdomain or IP address. If you have domain use https and if you want to access the GitLab interface through you server IP address use http.
/etc/gitlab/gitlab.rb
external_url 'https://gitlab.example.com'
Next search for “Let’s Encrypt integration”, uncomment the line starting with letsencrypt['enable'] and set it to true. Optionally if you want to receive emails from Let’s Encrypt concerning your domain uncomment the line starting with letsencrypt['contact_emails'] and add your email address.
If you set the external_url to an IP address then you should not enable Let’s Encrypt integration.
/etc/gitlab/gitlab.rb
letsencrypt['enable'] = true
letsencrypt['contact_emails'] = ['admin@example.com'] # This should be an array of email addresses to add as contacts
Finally save and close the file and run the following command to reconfigure Gitlab:
$sudo gitlab-ctl reconfigure
The command will reconfigure the GitLab settings and generate a free Let’s encrypt SSL certificate.
Configure GitLab through the Web Interface
Now that you have configured the GitLab URL you can start with the initial configuration through the GitLab web interface.
Launch your web browser and navigate to:
https://your_gitlab_domain_or_server_IP.com
1. Setting administrative account password
The first time you access the web interface you’ll be prompted to set the password for the administrative account.
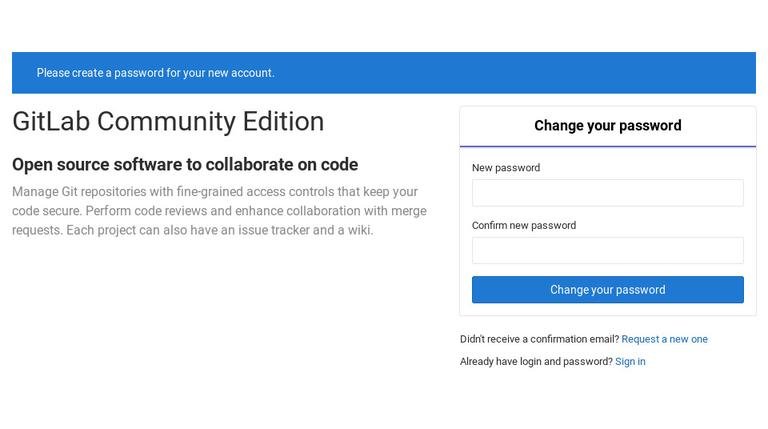
Enter a secure password and click on the Change your password button when you are finished.
You will be redirected to the login page:
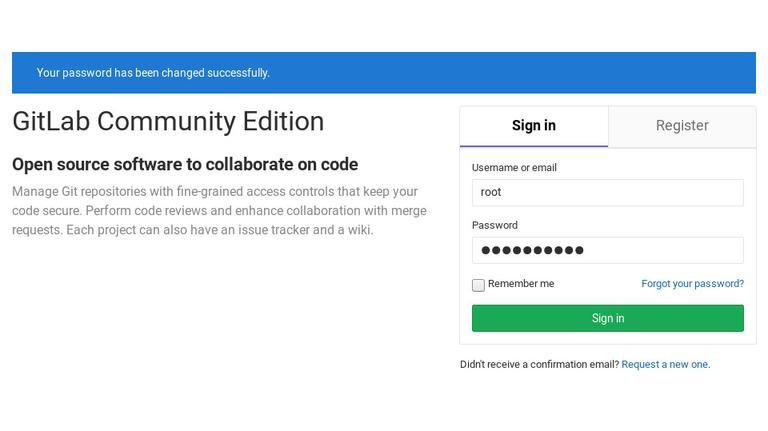
The default administrative account username is root. Later in this tutorial, we will show you how to change the username.
- Username: root
- Password: [the password you have set]
Enter the login credentials, click the Sign in button and you will be redirected to the GitLab Welcome page.
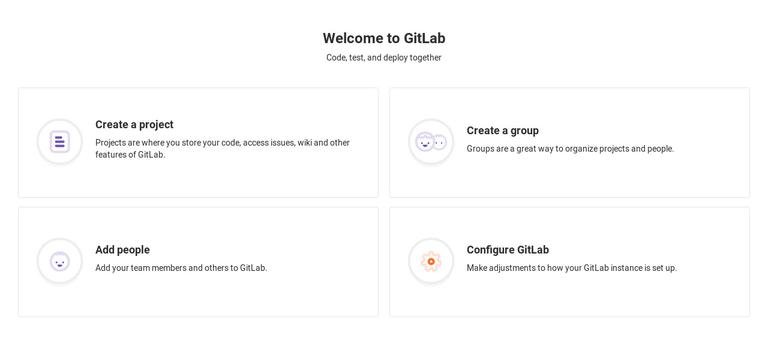
2. Editing User profile
The first thing you will want to do is to edit your user profile. Click on the user avatar (upper-right corner) and from the drop-down menu, select Settings:
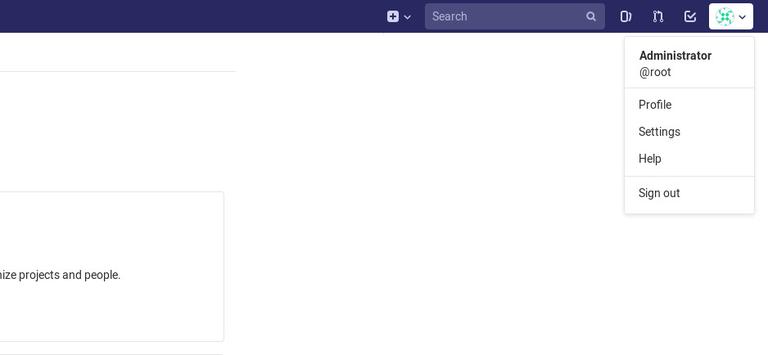
Here you can change your Name, Email, and other profile information and settings. Make the changes according to your liking.
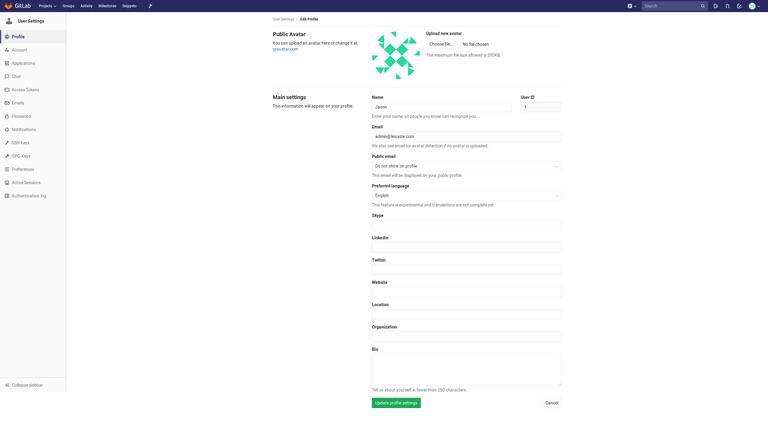
Once you are done click on the Update Profile settings button and shortly you will receive a confirmation email to the address you provided. To confirm your account follow the instructions provided in the email.
3. Changing Username
To access the Profile page, click on the Account link from the left-hand vertical navigation menu.
As you already know the default username of the first administrative account is root. To change it just type your new username and click on the Update username button.
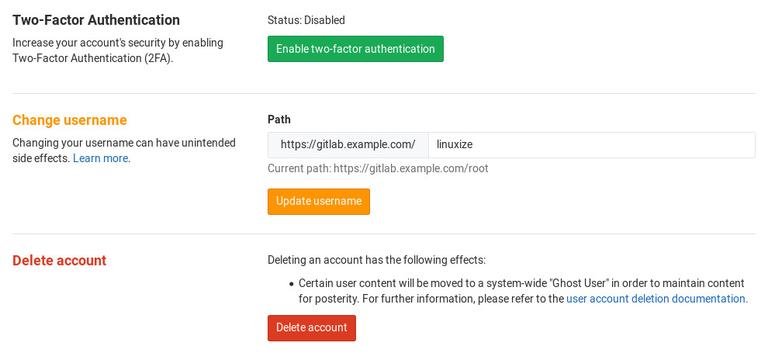
On this screen, you can also enable two-factor authentication.
The next time you log in to your GitLab dashboard you will need to enter the new username.
4. Adding SSH Key
To be able to push your local git changes to the GitLab server you to add your SSH public key to your GitLab account.
If you already have an SSH key pair created on your local system you can display the public key by typing:
$cat ~/.ssh/id_rsa.pub
The output should look something like the following:
$ssh-rsa AAAAB3NzaC1yc2EAAAADAQABAAACAQDd/mnMzHwjUzK8g3ldfsfRpJuC16mhWamaXRk8ySQrD/dzpbRLfDnZsLxCzRoq+ZzFHGwcQlJergtergdHGRrO8FE5jl3IWRRp+mP12qYw== admin@thuevps.com
In case the command above prints No such file or directory it means that you do not have an SSH key pair generated on your machine.
To generate a new SSH key pair use the following command:
$ssh-keygen -t rsa -b 4096 -C "your_email@domain.com"
Copy the output from the cat command and go back to the GitLab’s web interface. Click SSH Keys from the left-hand vertical navigation menu to access the SSH Keys configuration page.
In the Key textarea paste the public key you previously copied from your local machine, set a descriptive title and click on the Add key button
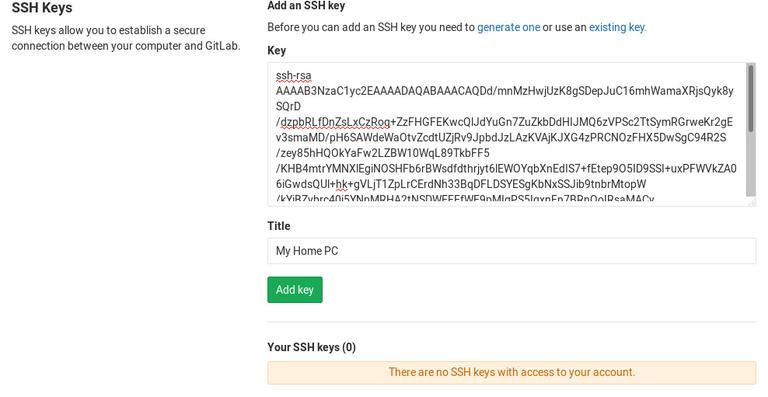
Now you should be able to push and pull your project changes from your local computer without having to provide your GitLab account credentials.
Conclusion
This tutorial walked you through the installation and configuration of GitLab on CentOS 7. You also learned how to edit your profile settings, how to change the username and add an SSH key. You can now create your first project and start using your GitLab.
If you have questions, feel free to leave a comment below.

